
It’s mid March and the snow has started falling again, so it seems like a good time to snuggle up under a blanket and write another blog post! My subject today is the making process, which in my case has many stages, but it’ll give you a rough overview of how I make my pictures and dioramas.
Each piece I make stems from a black and white line drawing in my sketchbook, or more often a series of drawn shapes and patterns rather than a fully formed ‘scene’. I photograph each drawing and piece them together using Photoshop on my laptop. From here I can create layers and manipulate them to give me a rough idea of how the finished picture will look.
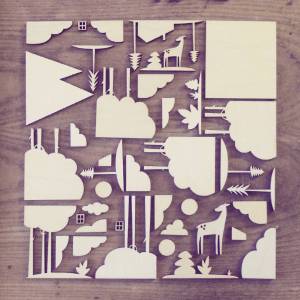
![20170524_201148[1]](https://hooperhart.com/wp-content/uploads/2018/03/20170524_2011481-e1521387877946.jpg?w=276)
In a way it’s like working out how the layers for a screenprint will look, but each layer will become a ply shape rather than a silkscreen. Each piece has to fit into a frame or a box so a lot of measuring and re-measuring takes place; in the case of the above design where some shapes will touch the inner frame top and bottom, the tree sizes have to be exact to fit perfectly. Once I’m happy with this stage I can then turn each separate piece into a vector drawing using Inkscape, ready for laser cutting. Depending on the size and complexity of the finished work, the number of shapes needed can vary from 4 for a framed picture to 27 for a box diorama! When my vector drawings are finished I can then email them off to my lovely laser cutting lady who goes by the name of LaserFlair
I spent many hours at the start of the year working on new drawings which this week arrived in the flesh, so to speak. It’s always exciting when a parcel from LaserFlair comes, and I can’t wait to get started printing, painting and glueing! (But before I do that I like to lay it all out at right angles aka ‘knolling’ – I can’t help myself!)
So the design process is the most lengthy part, but once that is done there’s lots of scope within to allow me to create a very different look for each piece I make, whether it’s through use of colour, pattern or even the placement of the ply shapes. Each item I make gets a unique twist! First off I decide on a general colour scheme, but that sometimes changes halfway through and goes off in a different direction! The smaller areas of wood are painted, while larger ones are printed. It helps to be working on 2 or 3 things at the same time so there’s no waiting around for ink to dry…once each piece has colour and pattern I can start placing them in their frame or box, which involves creating something of an infrastructure (ie lots of little bits of ply in strategic places) to attached the layers to. With the smaller boxed dioramas this can get very fiddly indeed, and the tweezers are usually on standby!


And that’s more or less the process – it’s laborious at times but every piece is a labour of love. I get so much satisfaction from my work; my favourite days involve sitting in my wee studio, listening to arts programmes on the radio, and making my dioramas.

