Fray

Now and again a customer will contact me to ask if I can make a unique piece for themselves or a loved one which will incorporate an element personal to them. I don’t go out of my way to advertise the fact I can make bespoke pieces, mainly because they can be very time-consuming (not to mention nerve-wracking), and at certain times of the year it’s just too difficult to fit around everything else that’s going on.

Having said that, commissions can also be exciting, fun and educational!

Back in March I was contacted by a customer who’s husband was publishing a novel called ‘Fray’ and she wanted to give him a special, unique gift to mark the occasion. She thought my work was reminiscent of the book cover and asked if I could create something similar in diorama form; the book is set in the wilds of Glencoe and the cover artwork by Holly Ovenden features a red cottage set amongst the fir trees and mountains…

If you know my work then you’ll know that all of these things couldn’t be more right up my street if they tried! Mountains, trees, a remote cottage, an intriguing story within = some of my favourite things and what I strive for in a lot of my work. I was also very flattered and excited to be asked to make a piece to celebrate such a wonderful achievement.

As I could use Holly’s artwork as a direct reference point, and with it being very graphic in nature I initially thought “well this will be fairly straightforward”. Always foolhardy! You think I would know by now that starting a piece from scratch is always a lengthy process, even in this case when the separate layers are already quite obvious and I have a good quality image file to work from…to explain further I should really give you a quick rundown of the stages of the design process:

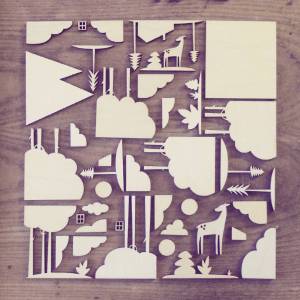
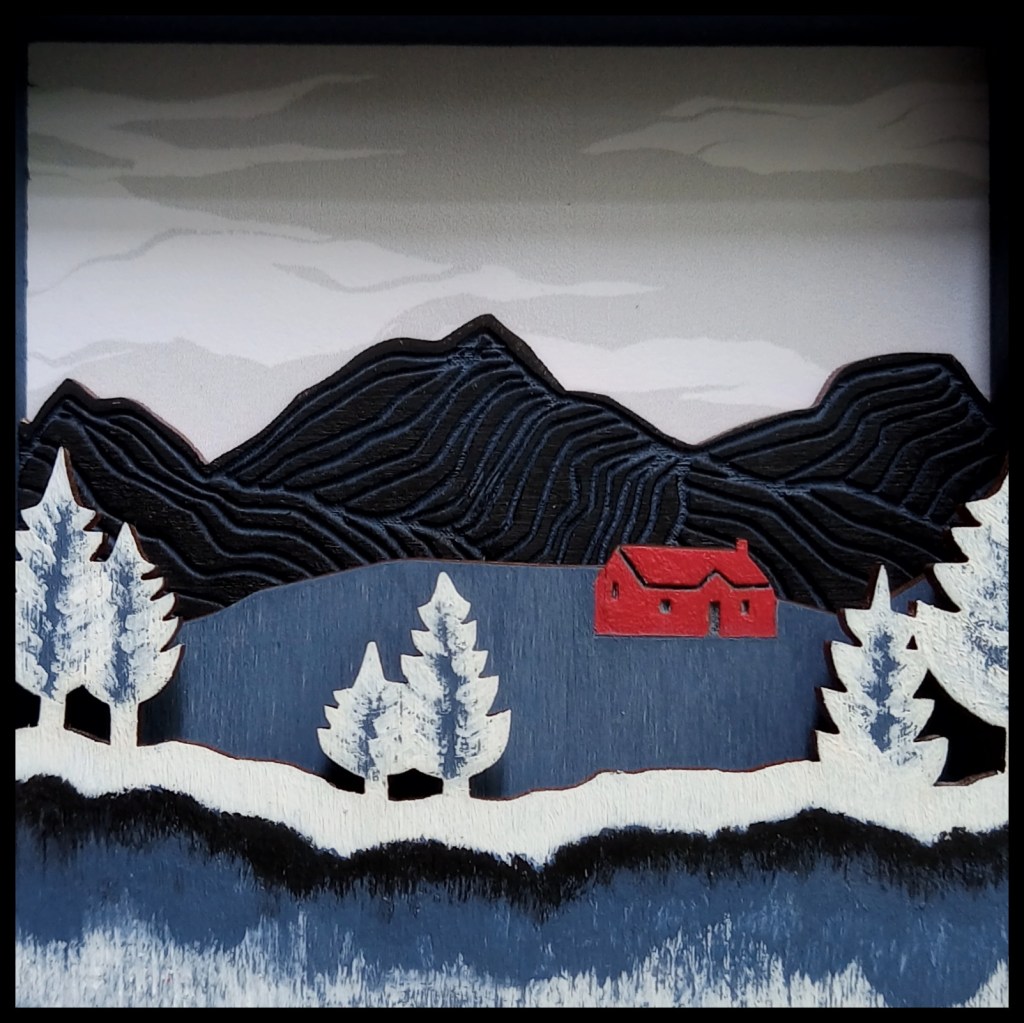
First of all I draw or trace out what will become the first layer, in this case the mountains with their contour lines; when I first saw the book cover design I was immediately taken by the use of contours which you would see on an OS map (again one of my favourite things to use in a diorama, but previously as an actual piece of map forming a backdrop). I thought they would look great laser-engraved onto the wood’s surface. I used to incorporate screenprinted elements in my work to create lines and pattern, but due to a lack of workspace over the past year I’ve replaced this with laser-engraving.

Even with the lines already in place in the cover design, I have to admit they took ages to get right – there was a fair bit of tweaking involved until I was satisfied they would work as engraved lines!

Then comes the 2nd layer – the land with the cottage; the cottage only measures just over 1cm wide so I knew I couldn’t attempt to paint the details of the roof, door and windows, so they all became engraing lines too. When working on this scale I always spend time ensuring no detail will be lost in the cutting process:

The same goes for the trees on the 3rd layer. At this point decisions had to be made regarding simplifying the design to make it work on a small scale (the final scene measures 8cm). This is where artistic licence comes in! I decided to reduce the number of trees and lose the reflection from the original cover design so it didn’t look too busy.

The shapes need to be solid black so that they can be turned into vector drawings readable by a laser cutter. As I have yet to join the 21st century I do this using Photoshop (rather than something like an iPad). While all this is happening I’m also thinking about how the final piece will be painted to create more depth and texture. To help me visualise the final piece I make a mock-up in Photoshop:

Once I’m happy with all the pieces, individually and together, I can then import them into Inkscape (a vector graphics editor). Inskcape enables you to transform drawings into outlines which will be cut or engraved by the laser cutter (for a deeper dive into this have a look at LaserFlair’s blog post).

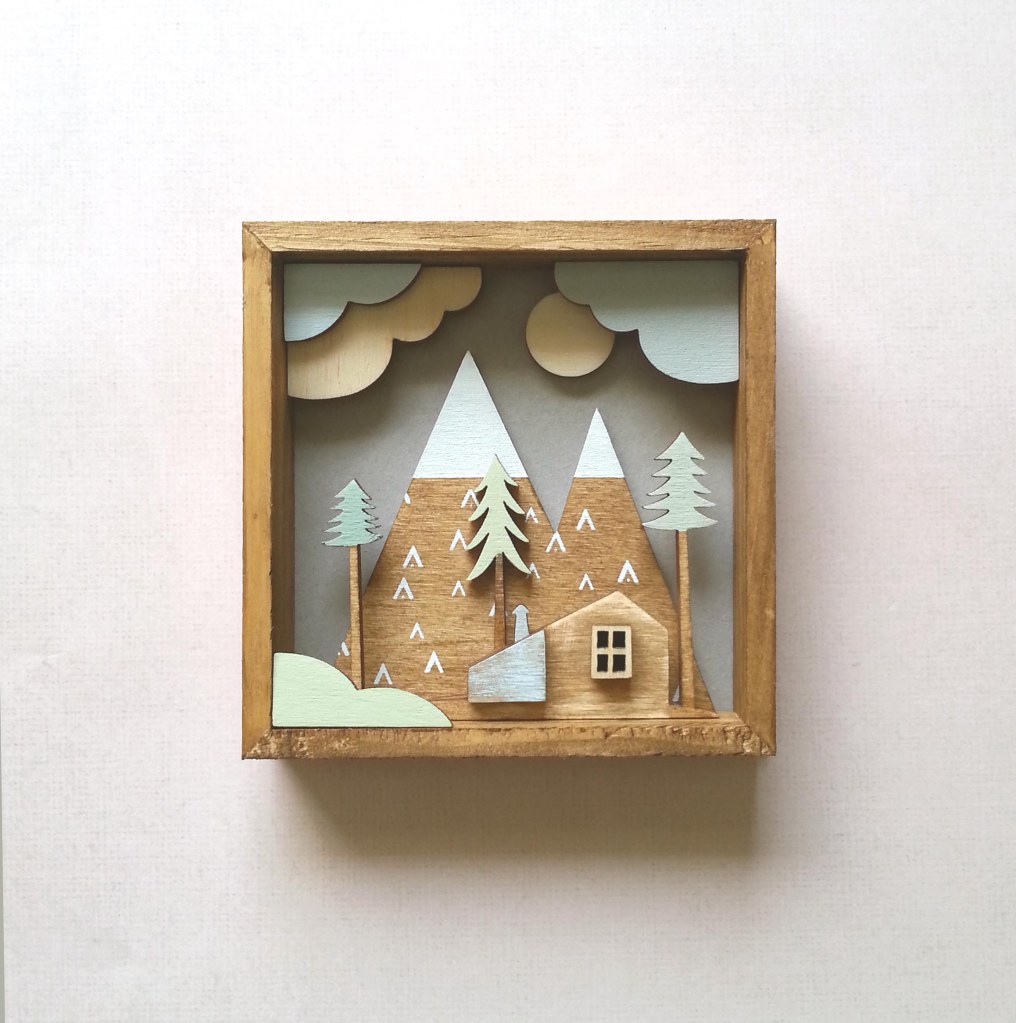
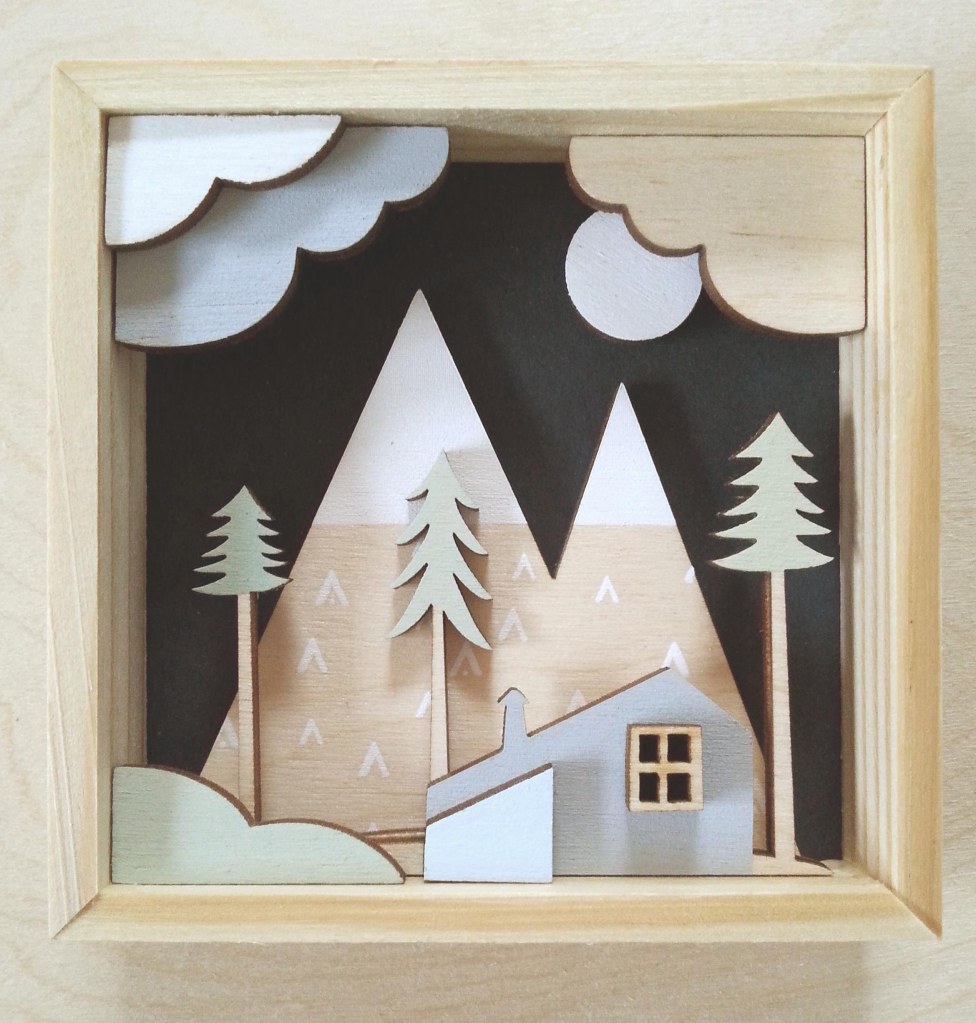
The really exciting part of the process comes when the pieces are finally cut; I always hold my breath though until I know that everything looks as it should…there are a multitude of things which need to be checked and double-checked before the start button is pressed! In this case everything came out perfectly I’m glad to say:

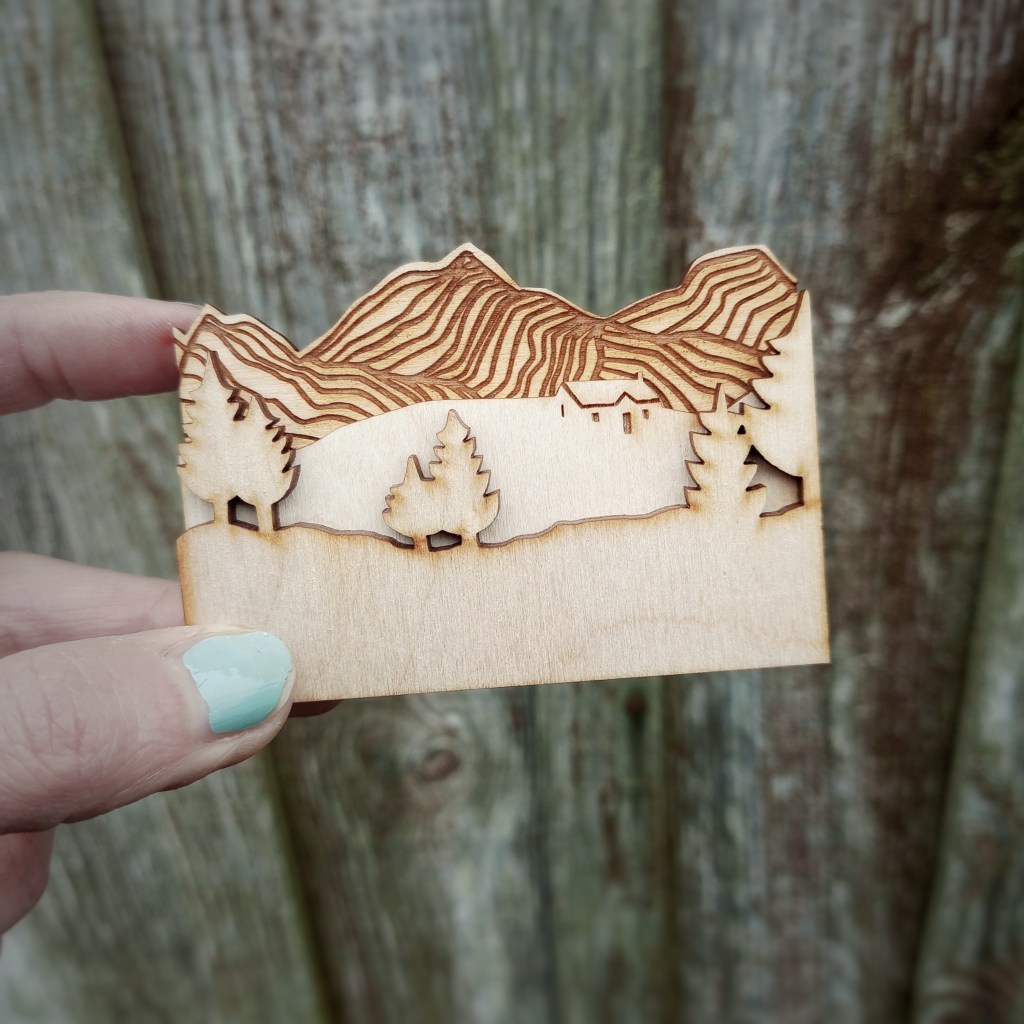
Of course the pieces still had to be painted and assembled, and the painting on this one in particular filled me with trepidation! Opportunities for mistakes are still plentiful at this point – I was concerned about painting the black mountains neatly to avoid blocking out the contour lines, and I also hadn’t nailed down the foreground area below the trees…

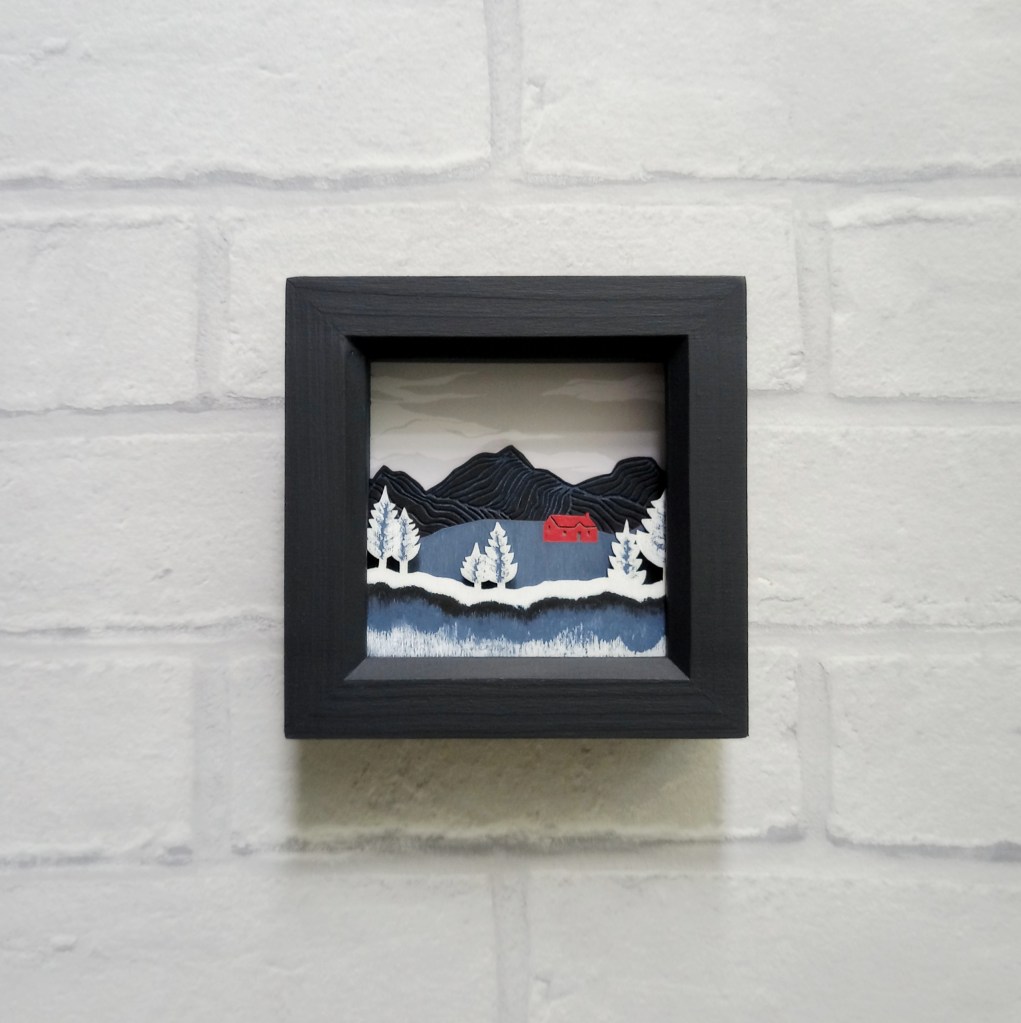
It all turned out fine in the end though, and I’m very happy to report that the customer and her husband loved the finished piece. I feel very honoured that my work is now a small part of the ‘Fray’ story. I can’t wait to read it!

‘Fray’ by Chris Carse Wilson is out now

Autumn Almanac

Another summer of record-breaking temperatures comes to an end…spectacularly in Perthshire with torrential rain and flooding replacing scorched earth and water shortages.

As we move into September, I’m trying not to focus on the implications of these extremes in the weather and staving off the melancholic thoughts by looking forward to my birthday (it’s a big one!), enjoying the changing colours on my daily walks, and planning the rest of the year’s making.

Wooden Autumn Decorations by HooperHart on Folksy
Fox Brooches by HooperHart on Folksy
Starlit Fox mini framed diorama by HooperHart on Folksy

The calendar is filling up with festive events and it’s looking like I’ll be a bit busier with these than last year, now that things have returned to normal (whatever that is!). Keep checking my ‘SHOP’ page for details of where you can find me in person this winter. See you soon 🙂

How it’s made

It’s mid March and the snow has started falling again, so it seems like a good time to snuggle up under a blanket and write another blog post! My subject today is the making process, which in my case has many stages, but it’ll give you a rough overview of how I make my pictures and dioramas.

Each piece I make stems from a black and white line drawing in my sketchbook, or more often a series of drawn shapes and patterns rather than a fully formed ‘scene’. I photograph each drawing and piece them together using Photoshop on my laptop. From here I can create layers and manipulate them to give me a rough idea of how the finished picture will look.

20170524_201148[1]

In a way it’s like working out how the layers for a screenprint will look, but each layer will become a ply shape rather than a silkscreen. Each piece has to fit into a frame or a box so a lot of measuring and re-measuring takes place; in the case of the above design where some shapes will touch the inner frame top and bottom, the tree sizes have to be exact to fit perfectly. Once I’m happy with this stage I can then turn each separate piece into a vector drawing using Inkscape, ready for laser cutting. Depending on the size and complexity of the finished work, the number of shapes needed can vary from 4 for a framed picture to 27 for a box diorama! When my vector drawings are finished I can then email them off to my lovely laser cutting lady who goes by the name of LaserFlair

I spent many hours at the start of the year working on new drawings which this week arrived in the flesh, so to speak. It’s always exciting when a parcel from LaserFlair comes, and I can’t wait to get started printing, painting and glueing! (But before I do that I like to lay it all out at right angles aka ‘knolling’ – I can’t help myself!)

IMG_20180108_094330_607

So the design process is the most lengthy part, but once that is done there’s lots of scope within to allow me to create a very different look for each piece I make, whether it’s through use of colour, pattern or even the placement of the ply shapes. Each item I make gets a unique twist! First off I decide on a general colour scheme, but that sometimes changes halfway through and goes off in a different direction! The smaller areas of wood are painted, while larger ones are printed. It helps to be working on 2 or 3 things at the same time so there’s no waiting around for ink to dry…once each piece has colour and pattern I can start placing them in their frame or box, which involves creating something of an infrastructure (ie lots of little bits of ply in strategic places) to attached the layers to.  With the smaller boxed dioramas this can get very fiddly indeed, and the tweezers are usually on standby!

And that’s more or less the process – it’s laborious at times but every piece is a labour of love. I get so much satisfaction from my work; my favourite days involve sitting in my wee studio, listening to arts programmes on the radio, and making my dioramas.

Cabin in the Woods

Well, as expected, 2018 is zipping by. Unbelievably we’re already into February; January was the usual struggle of getting back into the swing of things after a very busy festive season; happily, there was plenty of replenishing to do and new things to try out (along with a list of DIY jobs and trying to learn French on the side!) which got me through the darkest month.

When there is snow on the ground (like today), I like to daydream about living in a secluded wooden cabin, cosy in front of a wood-burning stove. It is no surprise then, that one of my favourite pieces to make is a cabin diorama!

I live in a mostly urban area, albeit in a relatively quiet corner of the town flanked by woods and river. Walk for a few minutes though, and the busy roads and new housing estates start to encroach on our peaceful enclave. The lack of foliage in the winter also leaves us a bit exposed, and I’m thankful for the line of tall evergreen leylandii at the end of our cul-de-sac, protecting us from the roar of the motorway. This might all go some way to explaining my ‘cabin in the woods’ fixation! I’ve made quite a few of these now, each one slightly different, and the most common response they illicit from people is ‘Oh I’d love to live there!’ . I guess it’s a fundamental desire in a lot of us to find solitude amidst the hectic pace of modern living, an antidote to our busy lives.

Home is where the anchor drops

There’s definitely an unwelcome nip in the air today, and my proclamations of “I’ve got high hopes for some warm weather in October, last year we had some really hot days” seem a bit optimistic now! Still, it is only the 3rd…

To distract myself from the low temperatures and worryingly dark evening dog walks, I like to daydream about living by the sea (this is nothing new, it has to be said). I achieved the dream for about 8 months in 2009 (ok, that was living by an estuary but near enough). One day, I keep telling myself. In the meantime I’ll just have to be satisfied with making nautical-inspired items! Anchors away!

Into The Woods

Mad Miss Morag the Lakeland Terrier has come to stay for the day (which always puts my dog Rudy’s nose a tad out of joint); whilst they are both snoozing in between bouts of general insanity, I’m taking the opportunity to write my second blog post!

It’s a bright, but chilly, Monday morning, and I’m watching a robin and a lovely little wren fluttering about in the garden. It’s all feeling rather autumnal so it seems appropriate to bring your attention to the Just A Card Into The Woods Autumn Shopping Guide!

IMG_20170830_110832_158

It’s a wonderful selection of art and craft on an autumnal theme featuring woodland-inspired items from 25 UK based independent makers, and features my Forest Diorama. Find out more about the Just A Card campaign for independent businesses here and have a read of their blog too – you’ll discover so many fantastic makers and get an insight into how they produce their lovely work.

Right, the Terrible Terrier Twosome are stirring – time to go!